Set up and use Whispir’s pushie app
pushie lets you communicate with your teams and customers more quickly, securely and cost-effectively using in-app push notifications sent from the Whispir platform. The app is available for mobile devices (phone and tablet) on Android and iOS platforms.
Push notifications are sent whenever:
- You send a message that has push notifications enabled, and
- One or more of your message recipients are active contacts for pushie.
Prerequisite
- Ensure that the pushie app has been enabled for your company. If you’re not sure, contact your Whispir account manager or contact the Whispir Support Team (support@whispir.com).
Steps
There are four steps to setting up and using pushie.
Note: You can skip this step if the contact already exists in the workspace you’ll be sending push notifications from.
- Follow the steps in Create a new contact in a workspace.
Ensure at a minimum that you enter data for the contact in the following fields: - First Name
- Last Name
- Email Address (Work Primary) (so the contact can be invited to pushie)
- Mobile Phone (Work Primary) (so their phone number can be linked to their pushie account).
- Save your new contact.
- Go to Step 2: Invite a contact to become an active contact for pushie.
Tip! If you’re likely to be sending push notifications to this contact from other workspaces, you can now copy or map them to those workspaces. See Copy, move or map contacts.
Role: Workspace Leader
After the contact has been created, a Whispir user with the role of Workspace Leader invites the contact to become an active contact. This process registers the contact’s mobile device against their Whispir contact details, and it sends them an email containing their pushie account activation code.
- Ensure that the required workspace is on the Workspace toolbar.
- Hover over the workspace to view the Workspace menu.
- Under Contact Management click Invite Active Contact. (If you can’t see it, click More to view more commands.)
The Invite Active Contact page opens. - Click To to open the Address Book, and then find and select the relevant contact and click Ok.
The contact is added to the To field. - In the Application field, under Custom Applications select the app (that is, select the name your company is using for the pushie app).
- In the Message Template field leave the default template.
- In the Subject field leave the default email subject line.
- Leave the message text as it is. In particular, do not alter the phone number and activation code @@ tags.
Note: You can select multiple contacts to send the invitation to if you need to.
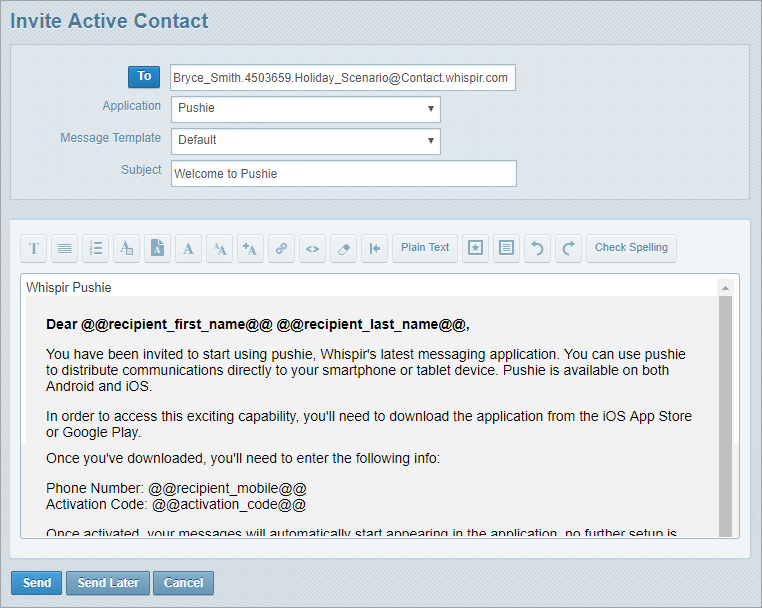
- Click Send.
The recipient receives an email containing the mobile phone number that was entered in their contact profile and an activation code. - Go to Step 3: The active contact downloads pushie and activates their account.
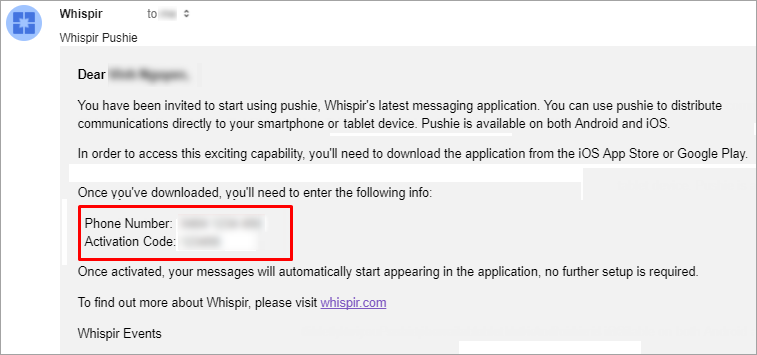
The new active contact performs the following steps:
- On their mobile device they open the Apple App Store or Google Play, depending on whether they’re using an iOS or Android device.
- They search for Whispir’s pushie app and download it.
- They open pushie, enter their mobile phone number and tap Activate.
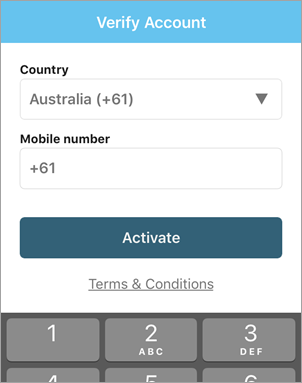
- They confirm their mobile phone number by tapping OK.
- They enter the verification code that was in their ‘welcome’ email from Whispir and tap Verify.
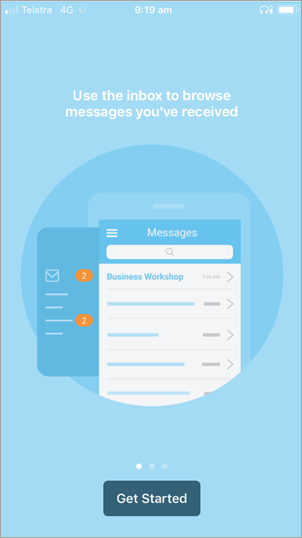
They’re now logged in to pushie and are ready to receive push notifications. They’ll also be able to chat with other message recipients about any messages they receive. - Go to Step 4: Send a push notification.
To send a push notification you create a message in Whispir in the usual way but you also ensure that the push notification settings are enabled in the message (or in the template you use for your message).
Note: If you simply enter a mobile phone number in the message’s To field and this number is associated with an active contact with a valid pushie account, Whispir will send them the push notification.
- If you’re using Whispir’s Rich Message Studio you enable push notifications on the Message Resilience tab at the Features step when you’re creating the message. See Understand a message’s Features settings for information about the settings.
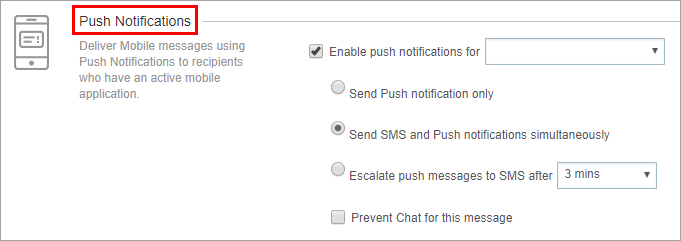
- If you’re using Whispir’s ‘classic’ message feature you enable them on the Features tab when you’re creating the message. See Understand a message’s Features tab for information about the settings.
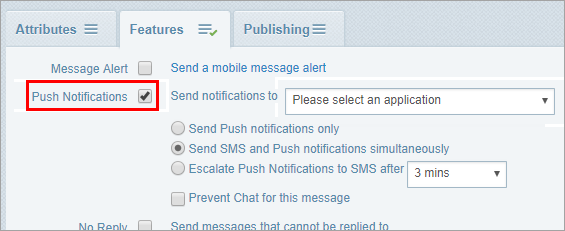
Note: You can also enable push notifications in a template (either a rich message template or a ‘classic’ template) and then use that template when you’re creating the message. See Create a new rich template from an existing one or Create a new ‘classic’ template.
You enter your push notification content in the message’s Mobile channel, and then add content to other channels (Email, Web and so on) if required. If you include Web channel content remember to include the @@web_link@@ tag in the Mobile channel content.
When you send your message:
- The Mobile channel content appears in the push notification on the recipient’s mobile device
- If your Mobile channel content included the @@web_link@@ tag, then when the recipient opens the message in pushie they see your Web channel content, not your Mobile content
- If your Mobile channel content didn’t include the @@web_link@@ tag, the recipient sees the Mobile channel content when they open the message in pushie
- Message recipients can use pushie’s chat feature to have a conversation about your message.
Related links
- About Whispir’s apps
- Create a new contact in a workspace
- Create a new ‘classic’ message
- Create a new rich message
- Understand a message’s Features tab (for 'classic' messages and templates)
- Understand a message’s Features settings (for rich messages and templates)
- About @@ tags (at-at tags)
- Invite and manage active contacts