Create a new rich template from scratch
Follow the steps below to create a template from scratch in the Rich Message Studio. This involves adding and editing the default components provided by Whispir (for example, text, images, buttons, maps and videos players) or adding components that you’ve already saved. Once you save the new template it’s available for you and other users in the same workspace to apply to new messages.
Tip! Alternatively, you can create a new rich template by editing an existing rich template and saving it with a new name. See Create a new rich template from an existing one.
Steps
- Ensure that the required workspace is on the Workspace toolbar.
- Hover over the workspace to view the Workspace menu.
- Under Template Studio click New Rich Template.
The New Template page opens at the Details step.

- Notice that:
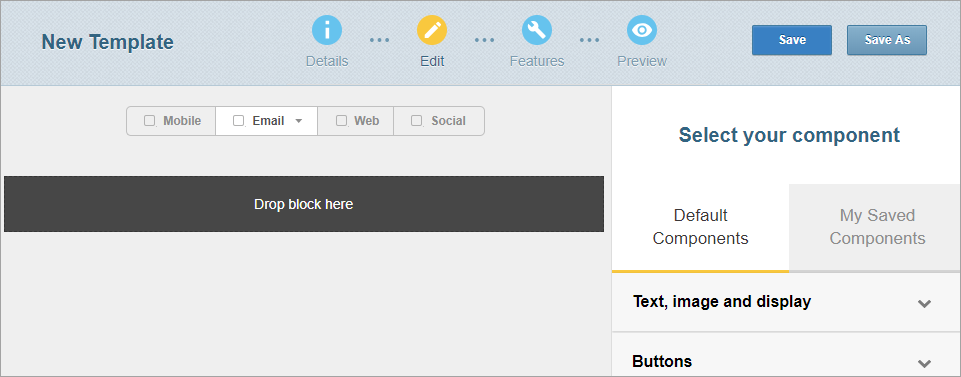
- The channel selector shows the available channels (such as Mobile, Email and Web). (The Social and Custom channels are only shown if your company is using these channels.)
- The currently active channel is highlighted.
- Go to Step 2. Add details in the Template details pane.
- In the Template name field give your template a name.
- (optional) Click To to open the Address Book to add one or more message recipients to your template (particularly by selecting distribution lists).
- (optional) Add information to the template to make it (and messages created from it) more readily searchable in Whispir:
- In the Subject field enter the subject.
This is an important field. It’s used both as the subject line in any email message that uses this template and as searchable content in Whispir itself. - In the Category field select a category.
- In the Description field enter a short summary of the template's purpose.
- In the Subject field enter the subject.
- (optional) In the Template Thumbnail section you can add an image that will display on the template on the My Templates page. Click Replace and then browse for or upload an image.
- Go to Step 3. Edit the blank template to add all required components.
Tip! You can also enter recipients directly into the To field if you know their phone numbers or email addresses. Separate the entries with a semicolon (;) and one space. If a recipient is a contact in Whispir they’ll receive messages (that use this template) via whichever channels are configured in their contact profile.
You build the content in your new template by adding components from the Components Library to each of the relevant channels and then adding or editing their default content. See Use the rich message/template components for more information. Add as much or as little content to each component as required.
- Click Edit in the progress bar.
- Notice that the Components Library pane is now open on the right.
Note: On the My Saved Components tab of the Components Library watch out for the icon with a blue triangle in the top right corner ![]() . It indicates your older saved components, which can’t be used with new messages or templates.
. It indicates your older saved components, which can’t be used with new messages or templates.

Some notes about adding content
- A green tick
 appears beside channels as you add content components to them.
 - You can add @@ tags (at-at tags) to your content to automatically insert system, recipient and sender information when the messages are sent. See About @@ tags (at-at tags).
- When you double-click a component in your message the editing pane opens on the right in Content mode. It displays all the editable properties for this component. Clicking Code switches to Code mode. It can give you greater control over your changes but you should only use it if you’re experienced in editing HTML code.

Note: You can only add plain text in the Mobile channel. You can’t include rich content in an SMS message.
- Select the Mobile channel.
- If there is no content yet find the Plain Text component in the Components Library (under Text, image and display) and either click
 beside it or drag it onto the message.
 - Hover your mouse over the component and click the edit icon
 .
.
The editing pane opens on the right in Content mode. - In the Plain Text property type add or edit the text.
The changes are immediately reflected in the content on the left. - Click Done.
Warning! Try to keep your message short. Be aware that a message that uses @@ tags (particularly the @@web_link@@ tag), special symbols, variables or different language character sets might hit the single message size limit more quickly. If it gets split over multiple messages your company will be charged for each one. See About SMS message length and About @@ tags (at-at tags) for more information.
By default Whispir sends email messages as a rich content email (that is, its content is in HTML format). If you specifically need the template to handle plain text email messages you can do this as well.
- Select the Email channel.
- If you only want to configure rich content emails go to Step 3.
- If you want to override the default mode and configure both rich email and plain text email (or only plain text email) go to Step 2.
- Do the following:
- Click the arrow beside Email.
- Click the link
 icon.
icon.


- Click Rich Email or Text Email to activate either option, as required.
- If there is no content in the Email channel yet, go to the Components Library and:
- Expand a category to find the required component.
- Click
 beside the component or drag it onto the template.
- In the template hover your mouse over the component and click the edit icon
 .
.
The editing pane opens on the right in Content mode. It displays the editable properties, grouped by property type. The main property type is expanded automatically. - Expand a property type and add or edit the details.
The changes are immediately reflected in the content on the left. - Click Done to close the editing pane.
- Add and edit all other components as required.
- Reorder your components if you need to: Hover your mouse over a component, click the move icon
 and drag the component to its new position.
You can add rich content to the Web channel – formatted text, images and interactive features. In fact, anything that can appear on a web page can be included.
Important! If you’re using the Web channel ensure that you also add the @@web_link@@ tag to your content in all other relevant channels. This will insert a URL link to the web page into those message channels when a message that uses this template is sent. See About @@ tags (at-at tags).
- Select the Web channel.
- If there is no content in the Web channel yet, go to the Components Library and:
- Expand a category to find the required component.
- Click
 beside the component or drag it onto the template.
- In the template hover your mouse over the component and click the edit icon
 .
.
The editing pane opens on the right in Content mode. It displays the editable properties, grouped by property type. The main property type is expanded automatically. - Expand a property type and add or edit the details.
The changes are immediately reflected in the content on the left. - Click Done to close the editing pane.
- Add and edit all other components as required.
- Reorder your components if you need to: Hover your mouse over a component, click the move icon
 and drag the component to its new position.
Note: You can quickly apply a theme to your Web channel content by using a Shared Template Styles component. See Use the Shared Template Styles components.
The Social channel is only available if it has been configured for your company. It allows you to publish messages to social media services (such as to your company’s Twitter, Facebook and LinkedIn accounts) or to other types of end point (such as an RSS feed, or a document file or XML file).
Depending on how the channel has been set up, you can enter the message content directly into the Social channel fields or it can be pulled automatically from any of the other channels.
To add content for this channel, follow the process that has been put in place for your company. Remember to also complete the details on the Publishing tab at the Features step. See Understand a message’s Features settings.
The Custom channel is only available if it has been configured for your company. It’s effectively an extension to the Social channel, providing a second avenue for publishing messages to a range of end points, such as Twitter, Facebook, LinkedIn, RSS feeds, or a document file or XML file.
It can be used to support messaging needs that are much more complex than standard messaging (for example, fire emergency warning messages that display on a website’s Home page).
Depending on how the channel has been set up, you can enter message content directly into the Custom channel fields or it can be pulled automatically from any of the other channels.
To add content for this channel, follow the process that has been put in place for your company. Remember to also complete the details on the Publishing tab at the Features step. See Understand a message’s Features settings.
You can apply a range of advanced features to a rich template. Any messages that you later create using this template will inherit those features.
- Click Features in the progress bar to go to the Features step.
- Click each tab in the Features steps to activate the required options and enter further details where required.
See Understand a message’s Features settings for more information about each setting. - Go to Step 5. Preview your template.
- Click Preview in the progress bar to go to the Preview step.
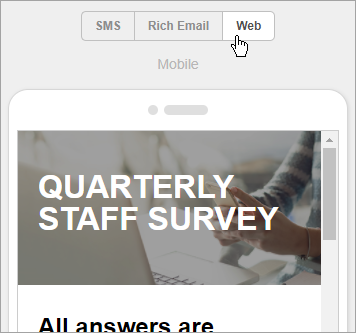
The page shows you how a message created using this template will appear on a desktop computer or mobile phone. - Click a channel selector to switch between different content views.
 .
.- If you need to make further changes return to the Edit step by clicking Edit in the progress bar.
- Go to Step 6. Save your new template.
- Click Save at the top right of the page.
The changes you made to the content and settings are now saved.
You can access the template on both the My Templates page (Workspace menu > My Templates) and the Template List page (Workspace menu > Template Studio). It’s now available for applying to new messages.